System Requirements
GOGIES IDE is optimized to be extremely lightweight and fast. It runs natively on standard web servers without any complex Node.js runtime bindings on the production host.
- Web Server: Apache, Nginx, or PHP Built-in Server.
- PHP Version: PHP 7.4 or higher (PHP 8.x recommended).
- PHP Extensions:
curl,sqlite3,zip, and write access permissions to thedata/folder. - Client Browser: Modern web browser (Chrome, Firefox, Safari, Edge) with ES6 Javascript enabled.
- Optional AI Agent Dependencies: Install these on your host system to unlock the full capabilities of GOGIES AI Agent:
- Node.js: Unlocks build tools (like npm/vite), dev servers, and automation runtimes.
- Docker: Enables safe, isolated sandbox testing of code and services.
- ImageMagick: Allows the agent to optimize, crop, and convert images for web performance.
Installation
Follow these steps to deploy GOGIES IDE on your self-hosted server environment:
1. Clone the Codebase
Clone the repository directly into your web server's public document root:
git clone https://github.com/alhelalat/GOGIES-AI-IDE.git /var/www/html/ide2. Configure Directory Permissions
The IDE writes session histories, settings, database backup archives, and configuration settings inside the data/ directory. Grant write permission to the web server user (typically www-data on Ubuntu/Debian):
cd /var/www/html/ide
chmod -R 775 data
chown -R www-data:www-data dataSince the IDE provides terminal execution capabilities to authorized users, you should bind your web server to localhost (127.0.0.1) rather than 0.0.0.0 to prevent external access from other machines on your local network.
Initial Setup
Once directories are configured, open your web browser and navigate to the built-in installer:
http://localhost/ide/install.phpThe installer wizard will guide you through the following setup configurations:
- Path Validation: Automatically detects your root application directory and verifies write permissions on the data folder.
- Admin Account: Create your primary administrator username and password.
- First Workspace: Create your initial workspace. You must provide a name and the absolute path to a folder on your server that you want to code in.
Upon finishing, the installer generates the config.php file, and you will be redirected to the login panel.
Workspace Management
Workspaces allow you to compartmentalize different coding directories. For example, you can create separate workspaces for different client projects or microservices.
To switch between active workspaces, use the dropdown selector located in the bottom left settings panel of the IDE. This switches your active workspace paths in the session environment and automatically reloads the file browser tree.
File Management
The file browser tree on the left side of the IDE panel allows you to interact directly with the active workspace directory structure:
- New Files/Dirs: Click the new file or new folder buttons at the top of the browser tree to create empty resources.
- Context Menu Actions: Right-click on any file or directory in the tree to trigger context actions:
Rename:Rename the selected resource.Copy:Create an instant copy in the current folder.Download:Download files directly from the browser.Decompress:Decompress zip archives directly on the server host.Delete:Recursively delete files and folders (requires user confirmation).
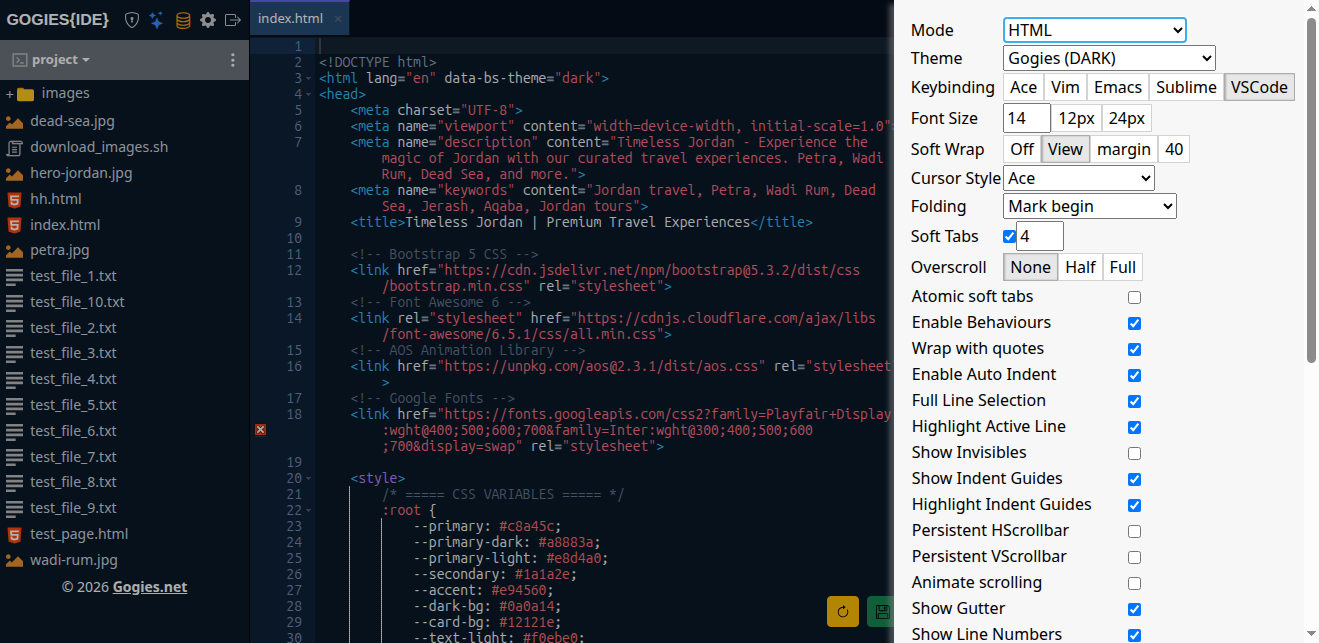
Code Editor
The core editing experience is built on Ace Editor. It features syntax highlighting for CSS, JS, HTML, PHP, Markdown, JSON, and Python.
Files that are write-protected or opened from non-editable locations automatically load in Read-Only Mode (marked with a badge). The save button is hidden for Read-Only files to prevent write errors.
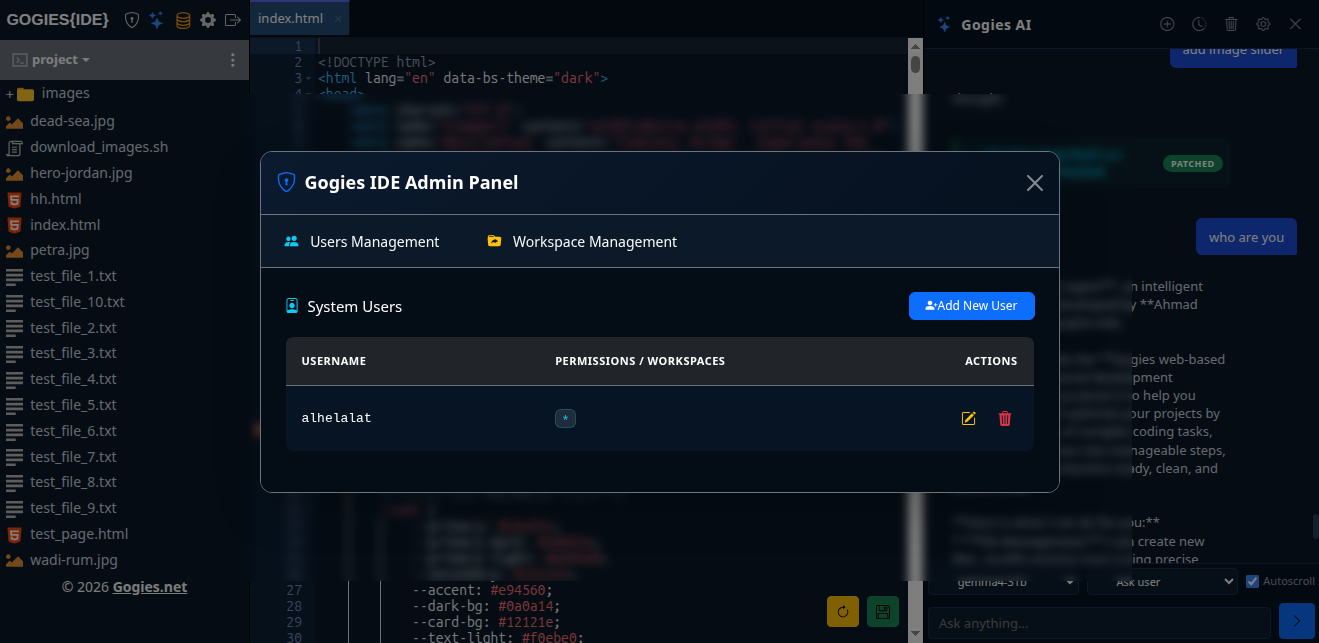
User Permissions
Users and permissions are saved in the data/users/users.php array. An administrator has the * permission, which grants full control to read and write files, execute commands via the terminal, and access the admin user manager console.
Standard developer accounts can be restricted to specific workspace permissions, ensuring they cannot read configuration files or access workspace directories they are not assigned to.
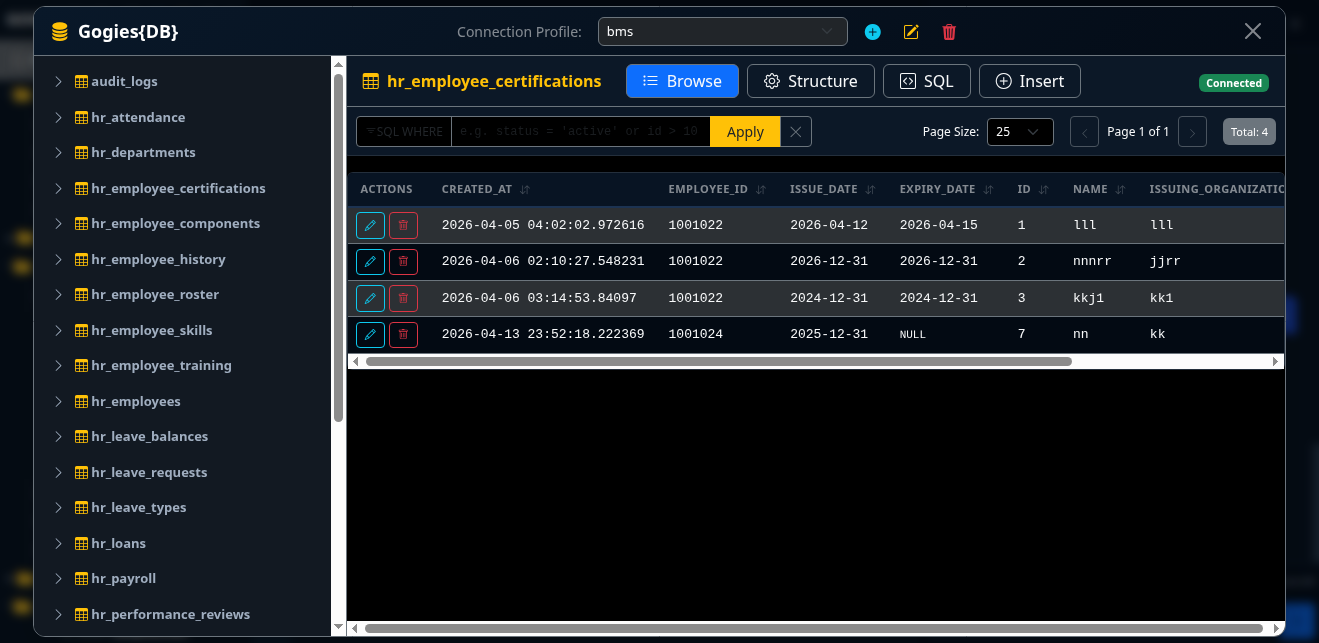
Database Manager
GOGIES IDE includes a fully integrated web-based Database Manager that allows you to inspect and modify physical databases directly alongside your code.
Supported Databases
The Database Manager supports SQLite, MySQL, and PostgreSQL connection profiles. Database credentials and connection parameters are saved securely on the server.
Inspection and Queries
- Table Inspector: Browse through schema structures, table definitions, indexes, and primary key setups.
- Interactive SQL Console: Write and execute arbitrary queries directly in the browser panel, showing formatted data grids and pagination controls.
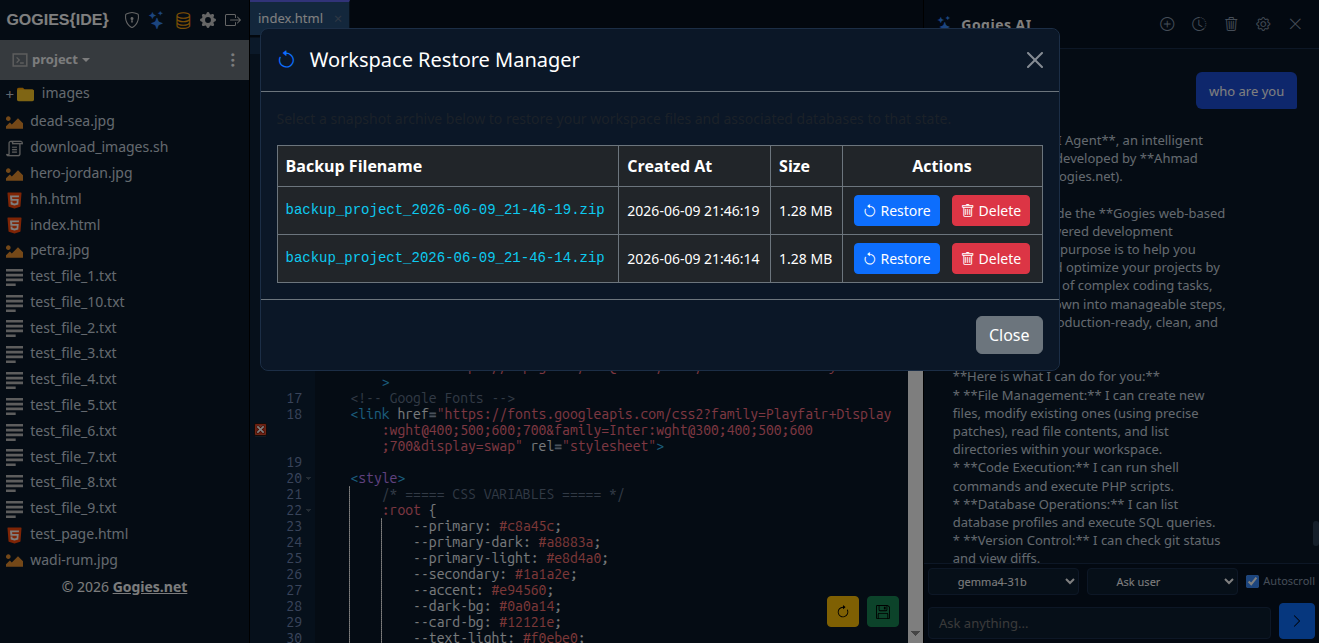
Workspace Backup & Restore
The IDE provides full-fidelity backup and restore actions to secure your development progress and database states.
Unified Workspace Backups
When you click Backup Workspace, GOGIES IDE runs a server-side routine to archive:
- All source code files and directory configurations inside your active workspace.
- Your database connection profiles.
- Physical SQLite databases and active MySQL/PostgreSQL table structures and row entries (exported as streaming SQL dump files).
The results are packaged into a single, highly compressed ZIP archive stored inside the data directory for easy download.
Easy Restoration
To roll back your system, simply choose a backup from the backup history panel and click Restore. GOGIES IDE will extract the workspace files and automatically re-run the table structure and data insertions in transactional blocks (using PDO transactions) to restore your databases to their exact previous state.
GOGIES AI Agent
GOGIES IDE includes a fully integrated, multi-turn **Autonomous AI Coding Agent** that pair-programs with you inside your workspace.
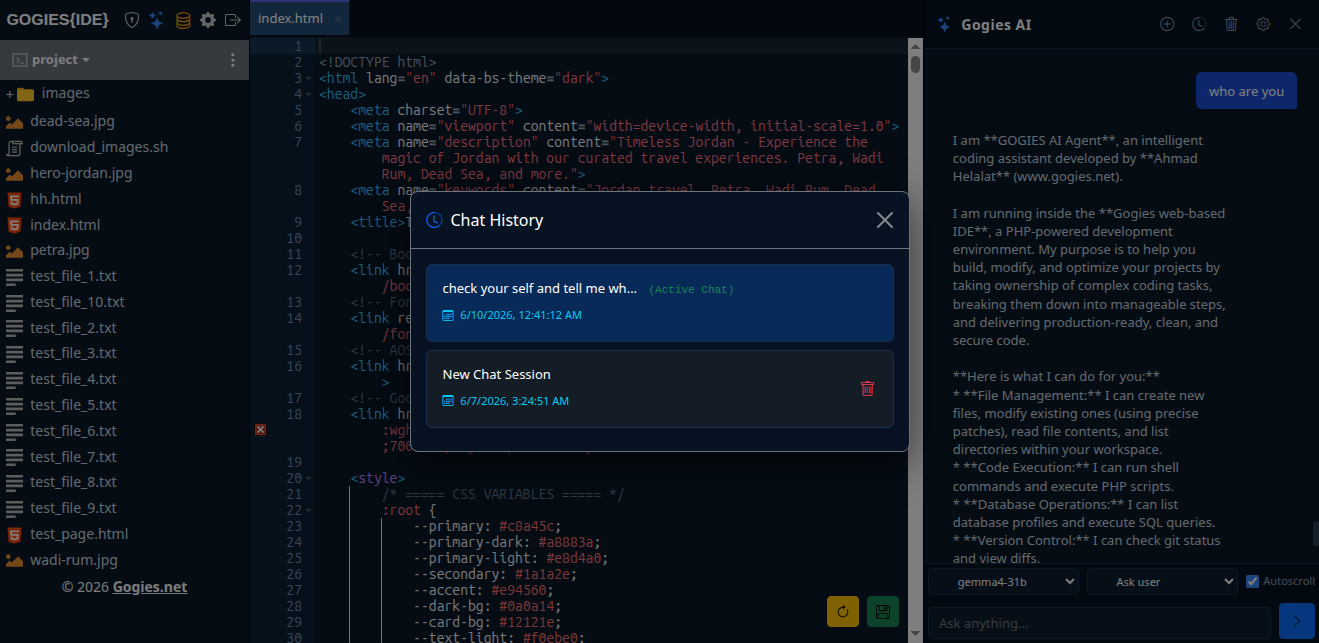
How it Works
The agent is given access to tools represented by XML tags. When the model outputs these tags in its conversational text, the IDE intercepts, processes, and executes them, sending the output back to the model automatically.
Sequential Multi-Action Execution
If the AI generates multiple tools (e.g. running a command and creating multiple files), the IDE executes them sequentially using an asynchronous queue. The results are aggregated and sent back to the model in a single unified turn, keeping the execution clean and efficient.
Custom Rules (agent_rules.md)
You can define project-specific behavioral rules for the agent. Simply create a file named agent_rules.md in the root of your workspace. The IDE will automatically read this file and append its contents to the system prompt, instructing the agent to follow your coding guidelines, libraries, or architectures.
Approval Modes
In the bottom AI settings menu, you can configure how the IDE authorizes write operations and command execution:
- Ask (Default): The IDE renders approval cards with diff previews and wait controls. The tool only runs if you explicitly click "Approve".
- Auto-Approve: Instantly executes terminal commands and file modifications for faster autonomous workflows.
- Auto-Reject: Blocks all writing actions and commands.
AI Provider Integration (Local & Cloud)
GOGIES IDE supports a wide variety of AI model configurations, allowing you to switch seamlessly between offline local runtimes and powerful commercial cloud APIs depending on your workflow and privacy needs.
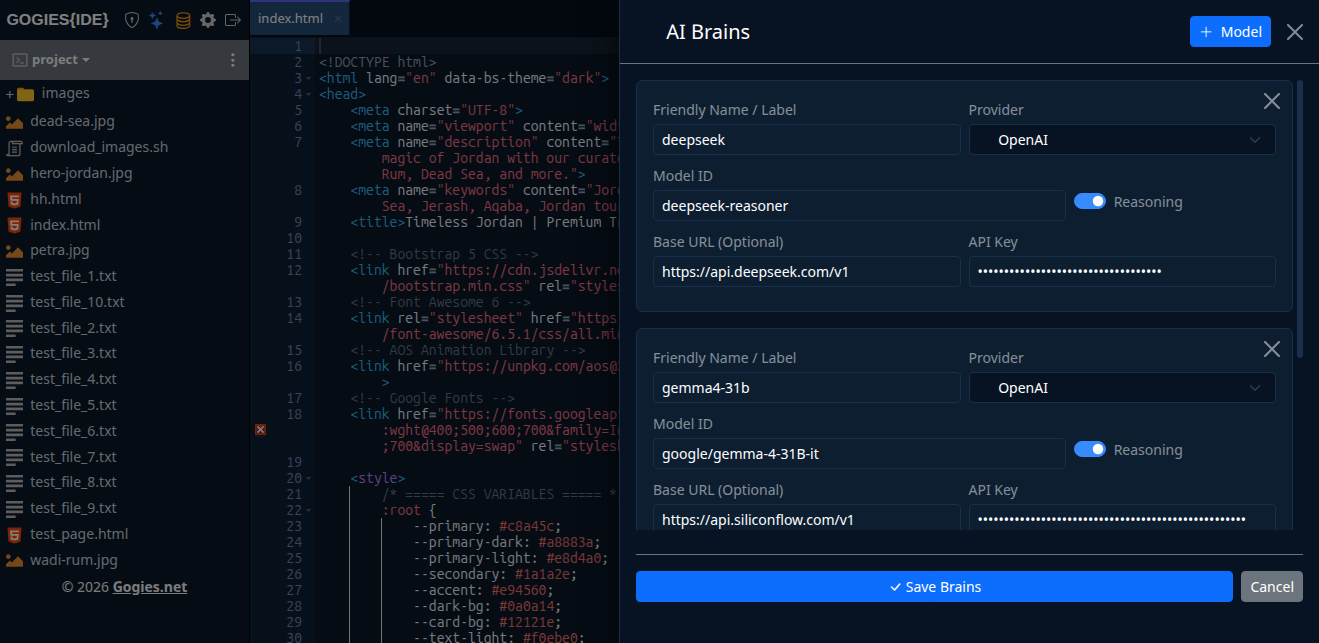
1. Cloud AI Provider Setup
You can connect the coding assistant to major commercial AI APIs by inputting your credentials in the AI settings panel:
- OpenAI: Provider set to
openai, API URL set tohttps://api.openai.com/v1, model set togpt-4o(or other OpenAI reasoning models), and input your OpenAI API Key. - Anthropic: Provider set to
anthropic, API URL set tohttps://api.anthropic.com, model set toclaude-3-5-sonnet-latest, and input your Anthropic API Key. - Google Gemini: Provider set to
gemini, API URL set tohttps://generativelanguage.googleapis.com/v1beta/openai, model set togemini-2.5-flash, and input your Google AI Studio API Key.
2. Local LLM Provider Setup (Ollama)
For fully private and offline development, you can run LLMs locally using Ollama:
- Install Ollama: Run the install script on your host system:
curl -fsSL https://ollama.com/install.sh | sh - Pull Coder Model: Pull a recommended development model such as
qwen2.5-coder:7bordeepseek-coder:ollama pull qwen2.5-coder:7b - Configure GOGIES IDE: In the AI settings menu, select the Local Ollama provider template, verify the API URL points to
http://localhost:11434/v1, and match the model name to your pulled tag (e.g.,qwen2.5-coder:7b). Leave the API Key field empty.
API Reference
You can interact with the IDE backend programmatically by sending POST requests to the api.php file. All requests must contain the session cookie for authentication.
Available Actions
- get_file_content: Fetches the source text of a file.
POST api.php?action=get_file_content&path=index.php - save_file_content: Saves source text to a path.
POST api.php?action=save_file_content Body parameters: path=index.php, content=your_code - list_files: Retrieves files and folders in a path.
POST api.php?action=list_files&path=assets/css